Tokens
Users can view well-known endpoints, provide authorization, and fetch Refresh tokens with Token endpoints.
Well-known Endpoints
A well-known endpoint is an pre-assigned address that is stable, which a server or application uses every time it runs commands. These allow for dynamic use of the endpoints inside of calls.
Below is a list of the existing well-known endpoints for CNH in the Production environment:
| Endpoint | Address |
|---|---|
| issuer | https://identity.cnhind.com/ |
| authorization_endpoint | https://identity.cnhind.com/authorize |
| token_endpoint | https://identity.cnhind.com/oauth/token |
| device_authorization_endpoint | https://identity.cnhind.com/oauth/device/code |
| userinfo_endpoint | https://identity.cnhind.com/userinfo |
| mfa_challenge_endpoint | https://identity.cnhind.com/mfa/challenge |
| jwks_uri | https://identity.cnhind.com/.well-known/jwks.json |
| registration_endpoint | https://identity.cnhind.com/oidc/register |
| revocation_endpoint | https://identity.cnhind.com/oauth/revoke |
To verify current, well-known endpoints, copy the following into your address bar:
https://identity.cnhind.com/.well-known/openid-configuration
Authorization
The first step in getting started is to authorize the application within the FieldOps API. The Developer will need to log in with either a Grower account or a Construction Equipment (CE) account and provide consent on behalf of the application to allow any calls to be made.
Once the Postman collections have been downloaded and imported into Postman successfully, the Developer will have access to the following call:
https://identity.cnhind.com/authorize?client_id={{ClientId}}&response_type=code&redirect_uri={{CallbackUrl}}&scope=offline_access&connection=PROD-ADFS-CONN&state=123&audience=https://ag.api.cnhind.com
The ClientId and CallbackUrl are variables that will be defined by the user in the Developer Portal and Postman should automatically replace with the appropriate information.
To authorize the application, perform the following:
- Access your Postman collection.
- Select the appropriate call labeled "GET STEP1: Authorize" in the left-hand menu.
- Without making any changes to the call, click the blue "Send" button on the right side of the panel.
- Once the body loads, look for the Console in the bottom left hand of the footer in Postman.
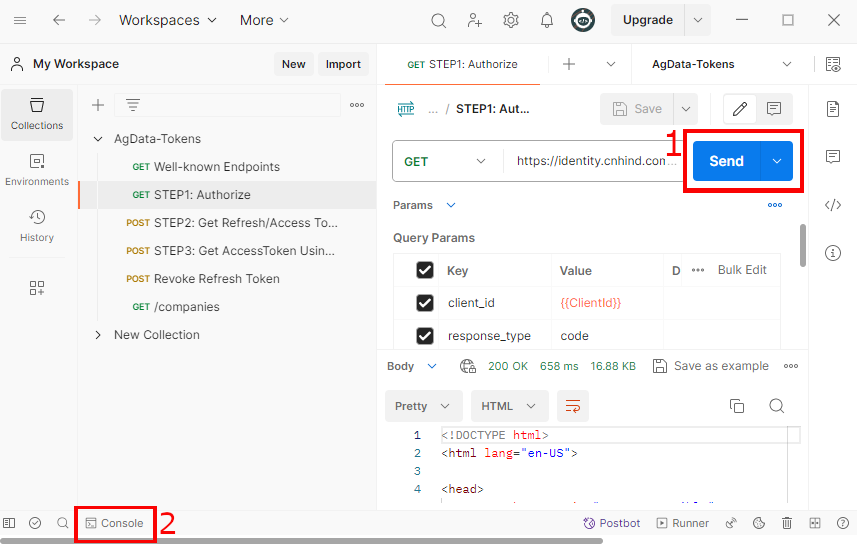
- The console will show 2 lines. Look for the top line, and copy the full URL that is provided, as shown below.
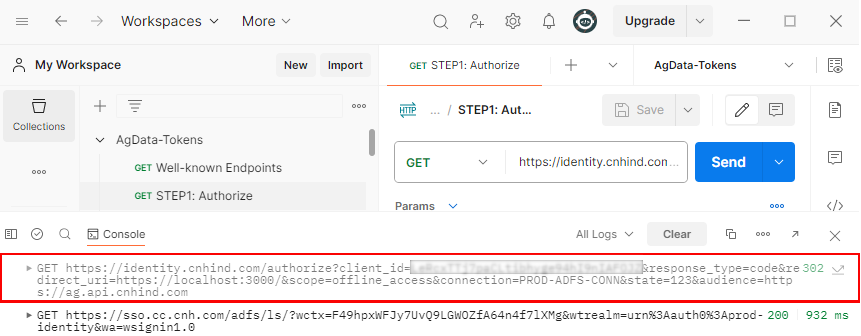
-
Open a new tab in your browser window and paste the URL into the address bar.
-
The URL will direct you to a login page. This is where you must have either a Grower account or a Construction Equipment (CE) account to log in with. NOTE: This will not be the same login as Developer Portal.
-
Once logged in, you will be prompted to provide consent on behalf of the application to use the FieldOPs API.
-
Once consented to, you will be redirected to the CallbackUrl that was set in the Developer Portal.
In the CNH Developer Portal, locate your application. Select the application name, which will take you to the application information page.In the API Information section, there is an area labeled "App OAuth Callback URL(s) (separated by ,)". This is the area where you would update and revise the CallbackURL variable.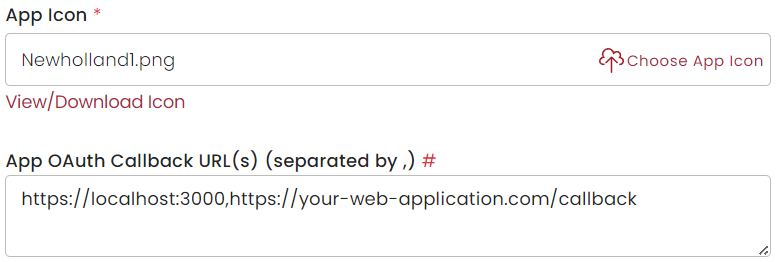
-
In the URL in the address bar, there is a variable that is generated called "code".
https://localhost:3000/?code=VVrYSQVvZjFAP7Ro
- Copy the code, starting after the equal = sign ("VVrYSQVvZjFAP7Ro" in the above example). This is the Authorization Code, which you will need to store in a secure location for the next section.
Refresh Token
Due to the fact that the Authorization Code has a very short TTL (Time to Live), the Developer will now need to use the authorization code (the string value from the previous step) to obtain a Refresh Token, which has no set expiration. The Refresh Token should also be stored in a safe location for later use.
To gain a Refresh Token, perform the following:
- Access your Postman Collection.
- Access your Environments.
- Select the appropriate name of your CNH Postman Environment.
- From the list of variables shown, locate the one labeled as "AuthorizationCode".
- Paste the Authorization Code from the previous section into the area labeled "Current value".
- Click "Save" in the upper right-hand corner of the screen.
- Return to the Postman Collection.
- Select the appropriate call labeled "GET STEP2: Get Refresh/Access Tokens".
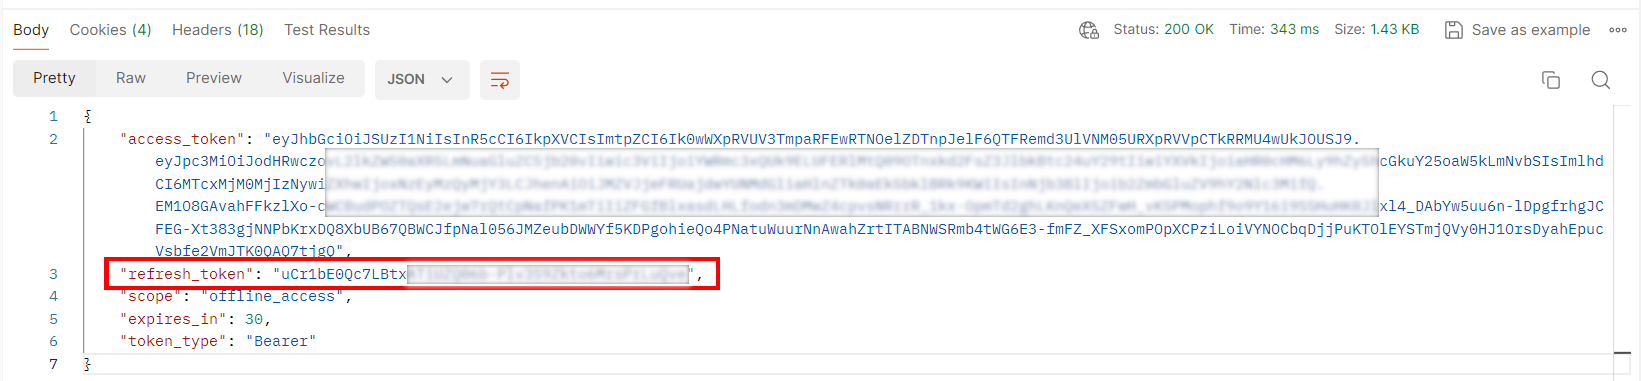
- Without making any changes to the call, click the blue "Send" button on the right side of the panel.
- Copy the "Refresh Token" that is listed in the BODY of the Postman Results, which you will need to store in a secure location for the next section.
Access Token
The final step in this 3-step process is to use the Refresh Token in order to obtain the Access Token, which can then be used to access the FieldOps API in the Production environment.
To obtain the Access Token, perform the following:
- Access your Postman Collection.
- Access your Environments.
- Select the appropriate name of your CNH Postman Environment.
- From the list of variables shown, locate the one labeled as "RefreshToken".
- Paste the Refresh Token from the previous section into the area labeled "Current Value of the RefreshToken" variable.
- Click "Save" in the upper right-hand corner of the screen.
You are now ready to use the FieldOps API.
Test It
Now that your Refresh Token is configured, you can easily test if the token exchange is functioning by running one last call in your Postman Collection.
- Access your Postman Collection.
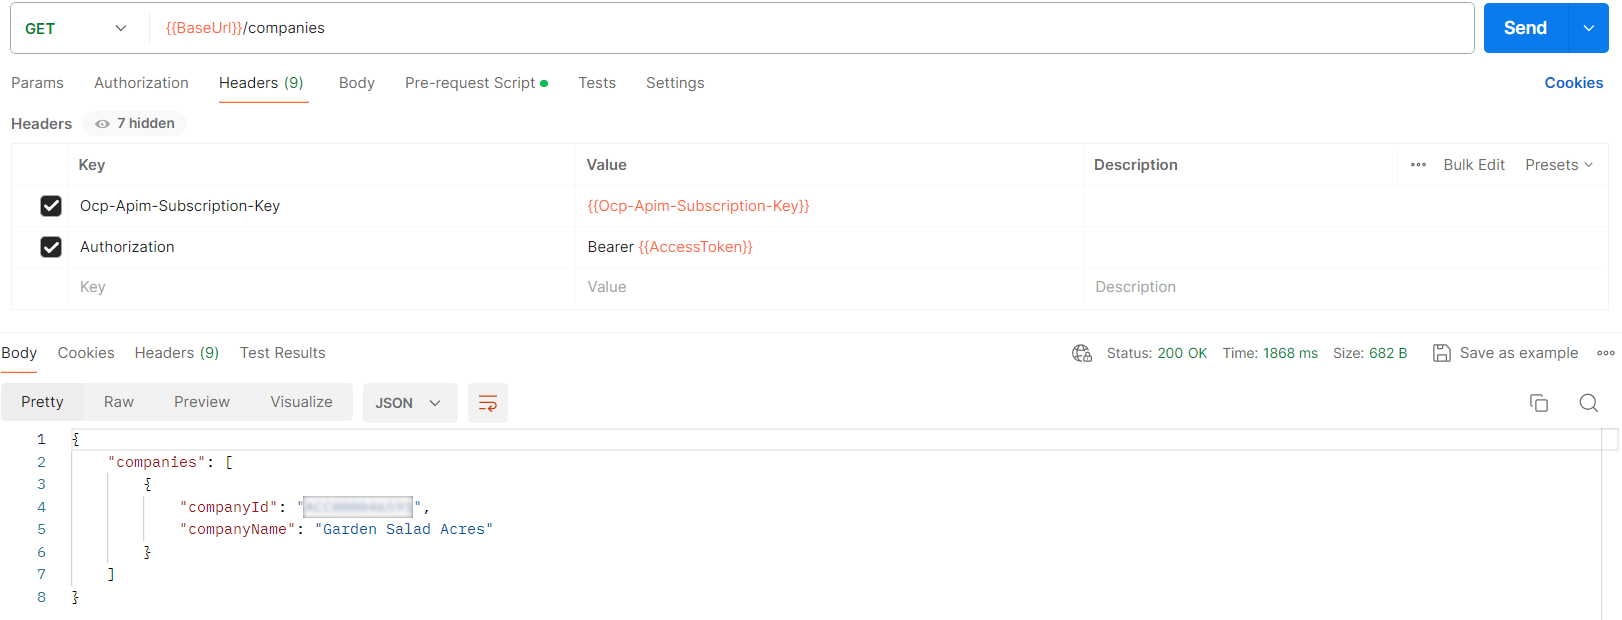
- Select the appropriate call labeled "GET /companies".
- Without making any changes to the call, click the blue "Send" button on the right side of the panel.
If successful, you should get a response similar to the below image.
Revoke
An important part of development using an API is controlling who has access to the API. With a short expiration on the Access Token, the main concern is the Refresh Token access for CNH.
To revoke access for a Refresh Token, perform the following:
- Access your Postman Collection.
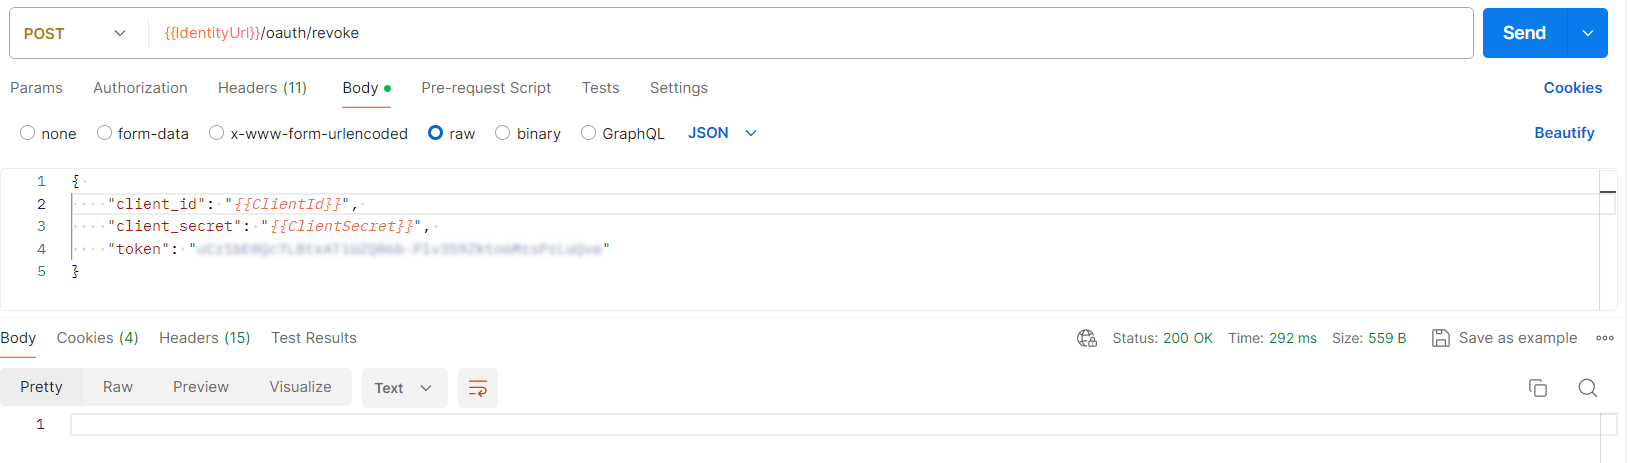
- Select the appropriate call labeled "POST Revoke Refresh Token" in the left-hand menu.
- Without making any changes to the call, click the blue "Send" button on the right side of the panel.
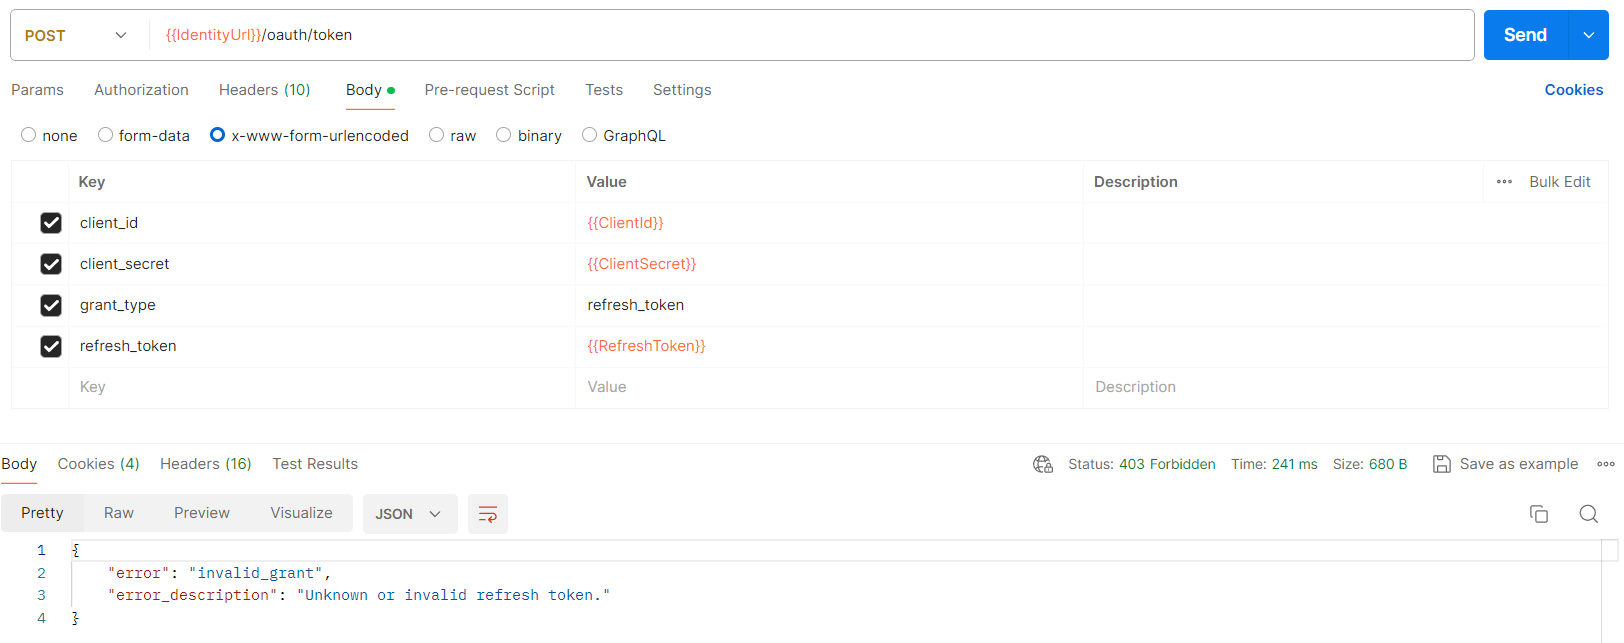
To verify that the token was successfully revoked, attempt to run the call labeled "GET STEP3: Get AccessToken Using Refresh Token" again and note the error: